Why You Need A Brand Board For Your Business
Branding tip
Why You Need To Be Using Pinterest
Biz Tip
My #1 Tip For Branding Your Business
Branding tip
The Importance of Defining Your Brand Personality
Branding Tip
Browse around
resources
Hey!
Brand design expert
I'm Ciera
I’ve been a graphic designer since 2006. Your business deserves amazing branding no matter what phase you’re in and I’m here to help!
Why You Need A Brand Board For Your Business
BRANDING TIP
Why You Need A Brand Board For Your Business
BIZ TIP
My #1 Tip For Branding Your Business
branding tip
The Importance of Defining Your Brand Personality
branding tip
DIY Your Brand
The Template Shop
Browse around
topics
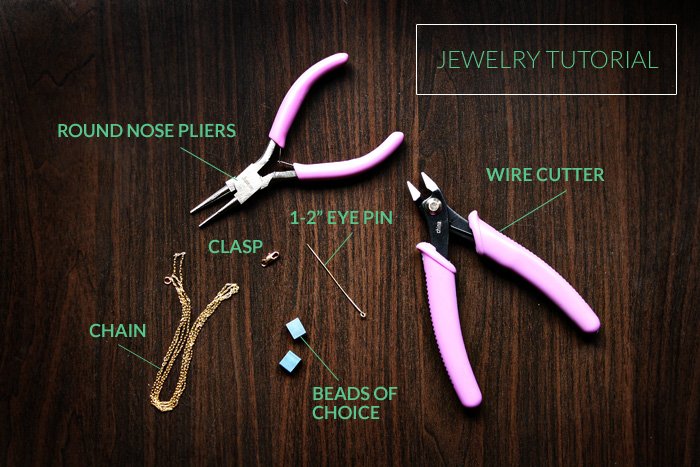
I’m so excited to be guest posting on Ciera’s blog today! I am a huge fan of everything that she posts here and hope you enjoy my jewelry tutorial! Before we begin, you must know that I’ve never made jewelry before I created the necklace I document below. I literally went to Hobby Lobby and thought, “What supplies make sense?” I had already ordered some amazing vintage Japanese beads on Etsy beforehand so I just needed to make sure I could thread them. Here are the supplies that I used:

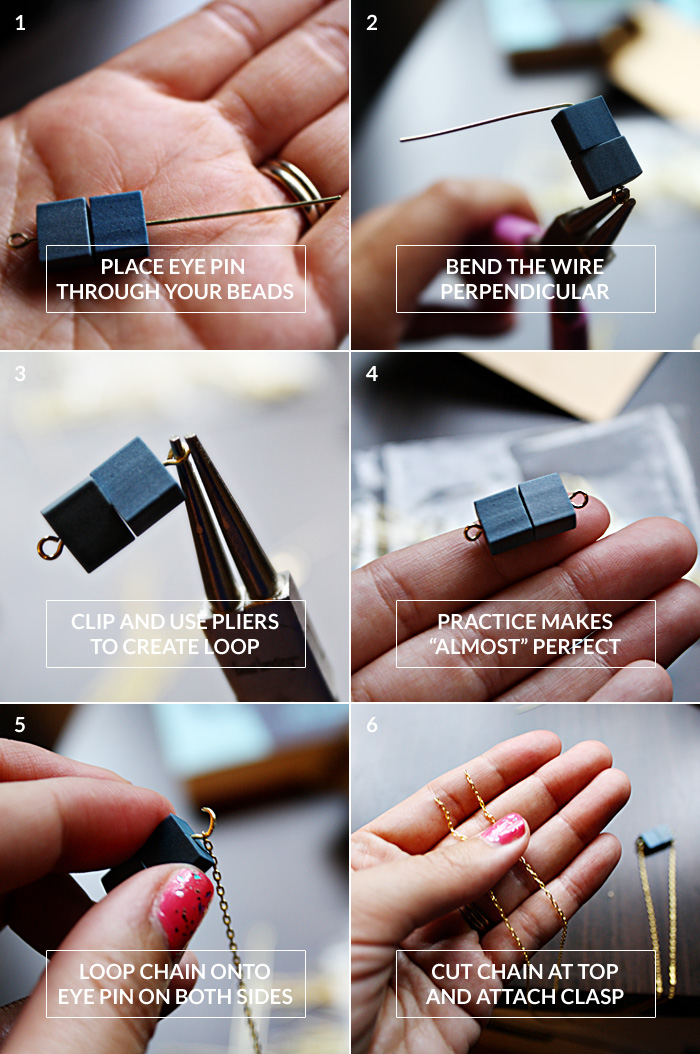
I picked up a basic jewelry tool kit and a few options when it came to chains. I ended up using a really thin (and cheap) gold chain so I’m excited to experiment with more quality supplies later. Here is a visual and brief tutorial below. I’ll go into more details on each step below the image!

Okay here’s more of an explanation for each step:
1. I am using a 2″ eye pin here. If I were to re-create this necklace again (which I probably will), I might consider adding a drop of super glue to keep the two beads together. If you aren’t extremely precise, it’s hard to keep them close together while closing the eye pin in the next step.
2. I used the round nose pliers to hold the eye pin steady while I literally bent the other end perpendicular.
3. I didn’t get a photo but I did clip the end of the eye pin so that it was shorter. I didn’t want to bend it into a loop and then have extra wire. Here is a great tutorial on creating loops with your eye pins.
4. As you can see, I have created the loop and now the beads are secured. My loop is definitely not perfect but it works!
5. I wanted to make sure I knew how to create a loop before I strung the chain through (so this is technically a little backwards) but by the time you get the hang of it, it doesn’t take a lot to pull the loop apart and add the chain.
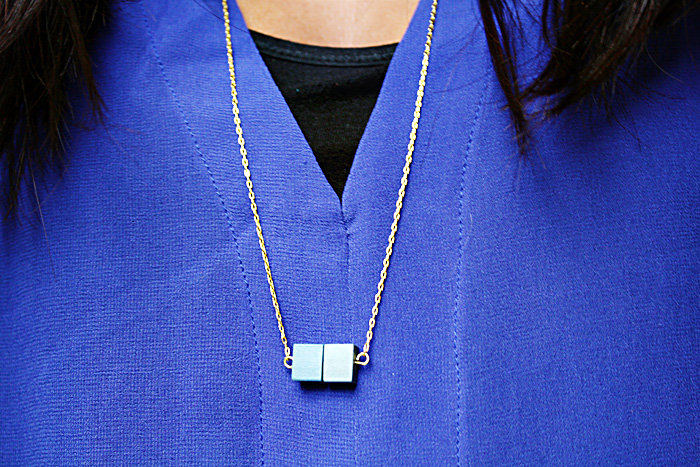
6. Now you have a completed and seamless necklace! After this, I snipped the chain (where it would fall on your neck) and added the clasp! Ta da! Necklace completed.

So there’s my beginners guide to jewelry making. I learned a lot and didn’t even really study any techniques. It was almost more fun going into it neutral and not having an preconceived ideas of what my necklace should look like. Let me know if you have any advice or tips – I’m all ears. >> written by Allison at Show & Tell
I think this came out so great considering it was her first jewelry making experience! A big thanks to Allison for sharing this with us while I’m away on vacation! – Ciera
Pin
Share
Previous Story
next Story
Get the free guide to learn the top mistakes when it comes to DIY branding.
6 Ways Your DIY Branding May Be Hurting Your Business
Free Guide
© 2023 Ciera Holzenthal LLC, DBA Ciera Design Studio.
Get the free guide download by over 2,000 people!
Discover Your Brand Personality
Join Me on Insta
[…] Huffington Post Kitchen Daily- Wicked Cheap In Boston- Passionfruit Ads Blog – Meet Ciera- This guest post inspired a beautiful mansita […]
So glad you all are enjoying, can’t wait to try myself!
[…] would be fun to document it all and share! I originally used this post as a guest blog post over on Ciera’s blog yesterday but I wanted to post it here too in case any of my readers missed it. Before we […]
What a great, simple tutorial. I love it when tutorials have clear images. Nicely done!
Thanks Nicole! I’m glad you enjoyed it!
Fun! This looks very doable. Thank you for your pictures and explanations. 🙂 I’ve tried making earrings before, so some of these techniques look familiar to me, but I’ve never actually tried making a necklace before. I just might have to try it! 😀
Try it out and let me know how it goes!!