Why You Need A Brand Board For Your Business
Branding tip
Why You Need To Be Using Pinterest
Biz Tip
My #1 Tip For Branding Your Business
Branding tip
The Importance of Defining Your Brand Personality
Branding Tip
Browse around
resources
Hey!
Brand design expert
I'm Ciera
I’ve been a graphic designer since 2006. Your business deserves amazing branding no matter what phase you’re in and I’m here to help!
Why You Need A Brand Board For Your Business
BRANDING TIP
Why You Need A Brand Board For Your Business
BIZ TIP
My #1 Tip For Branding Your Business
branding tip
The Importance of Defining Your Brand Personality
branding tip
DIY Your Brand
The Template Shop
Browse around
topics
Hi guys! My name is Julie and I blog over at Julie Ann Art. I’m so happy to be guest posting today! I’m going to show you how I transferred a design onto a pillow using a freezer paper stencil!
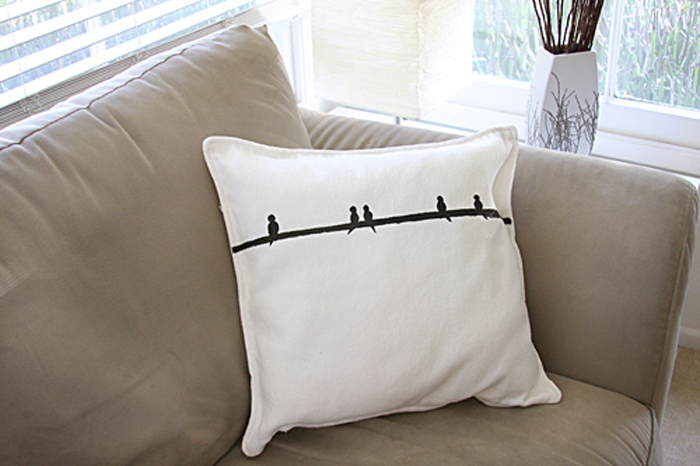
Since we moved we haven’t had any pillows for our couch. The main reason we don’t have pillows? My dog’s favorite thing is pillow stuffing. She will have the stuffing out of that pillow in a matter of minutes (seconds?). So no way am I buying a fancy schmancy $$$ pillow set. I bought one pillow from Ikea, sort of as a test. Maybe she grew out of her pillow chewing habits (yeah right). But this one white, boring pillow needed some help. I was throwing around different embellishment ideas when I remembered I had been wanting to try to make a stencil out of freezer paper. So here we go!
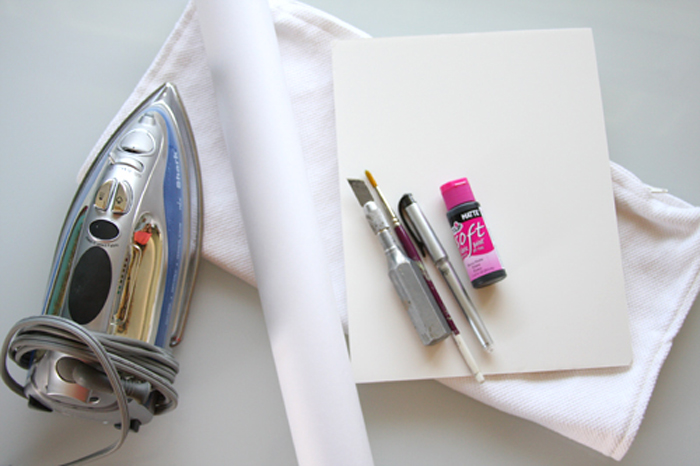
What you’ll need:Freezer Paper Fabric (pillow case, t-shirt, placemats, etc.) Fabric Paint Iron Exacto Knife Pencil or Pen Paintbrush Cardboard
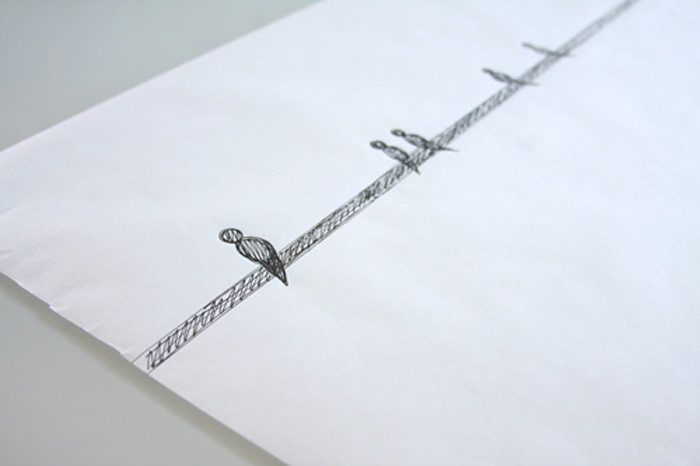
The first thing you need to do is transfer your design to the matte (not shiny!) side of your freezer paper. This can be done in multiple ways. I drew my design directly onto the paper. If you don’t feeling comfortable doing this, you can either a.) print the design on normal paper and then trace it on the freezer paper, or b.) print the design directly onto the freezer paper. Just make sure you only use an ink-jet printer if you’re going to print on it. Your call!
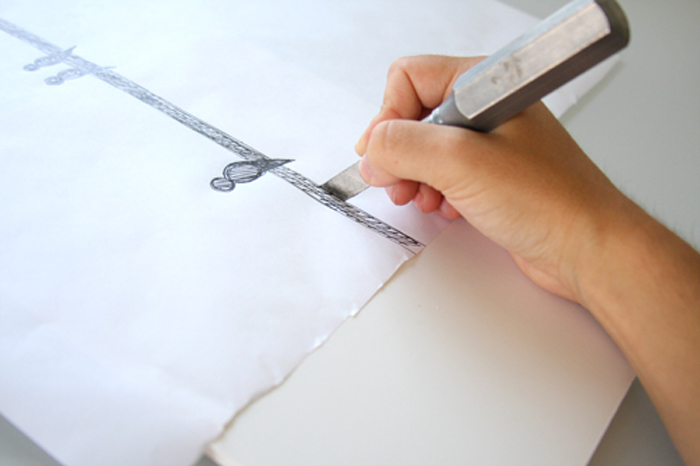
Next up, using your exacto knife, cut your design out of the freezer paper. Make sure to put some cardboard underneath the paper to make this process easier. This was surprisingly easy, the freezer paper didn’t give me any problems with tearing.
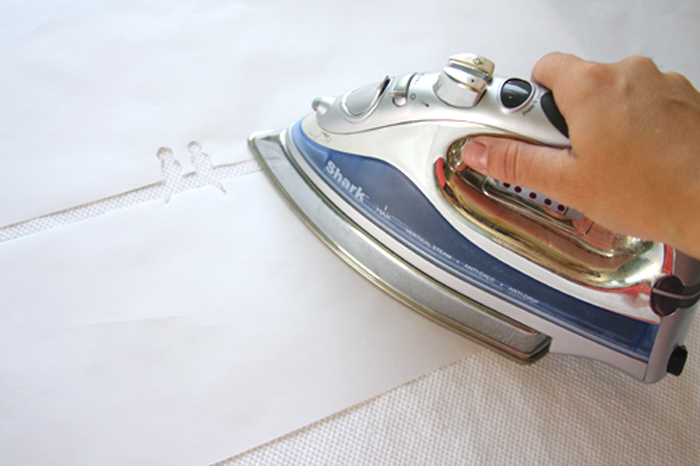
Once your stencil is ready, place it shiny side down where you want it on your fabric. Heat up your iron (I put mine on medium heat) and carefully start ironing, working your way from the middle of the design to the outside of the design. I went over my design multiple times. Make sure to pay attention to any intricate areas.
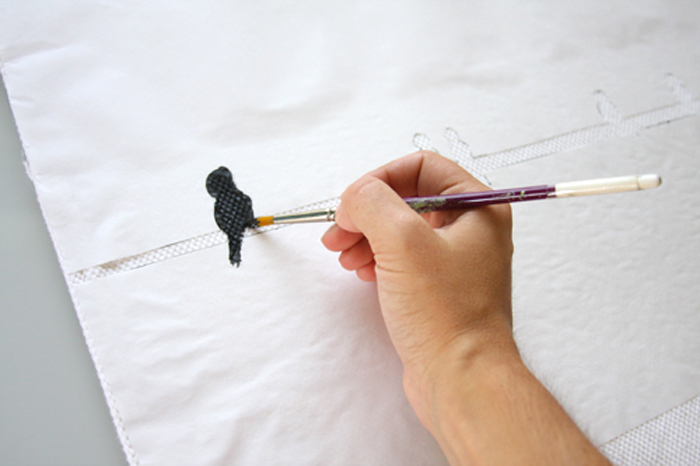
When the freezer paper is secured to the fabric it’s time to paint! Once again, make sure to cover all the intricate areas and edges completely. I got nervous at this part because I wasn’t sure if I had ironed it on well enough.
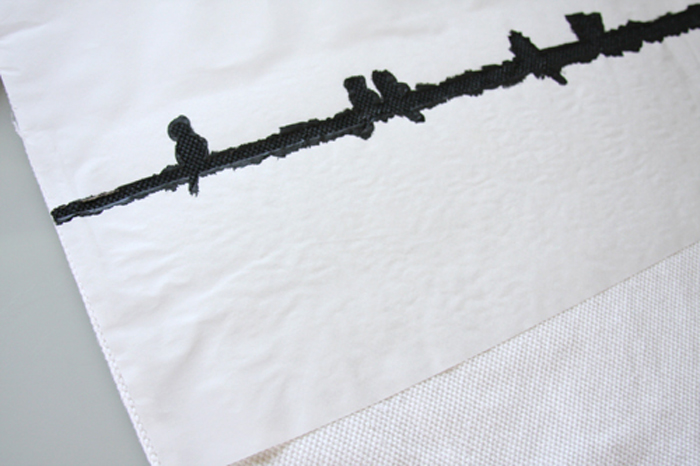
I let the paint dry for about an hour (although the paint bottle said it takes four hours to dry) and started pulling off my stencil. Whether you decide to wait the full four hours or not is up to your discretion. The stencil pulled off easily and now I have a cute little pillow.
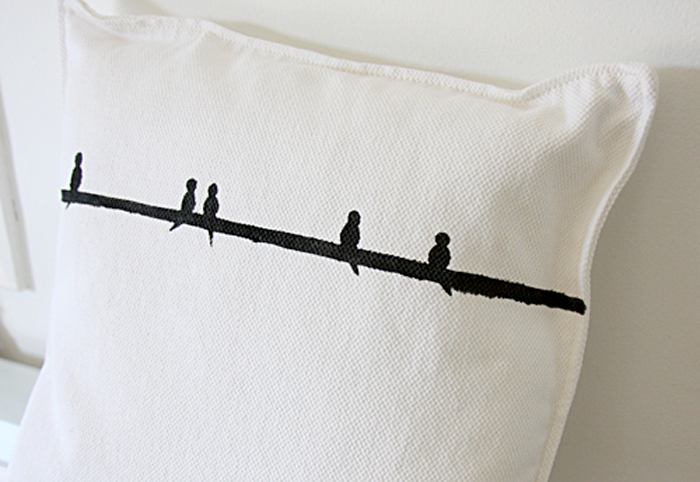
The possibilities for use of a freezer paper stencil are endless! I definitely want to try it on a shirt next. The looks it gives is very similar to that of screen printing. And don’t forget you can use freezer paper for what it was originally intended for…to store meat in the freezer. Have fun!
Thank you so much Julie! Who knew freezer paper had another use? I definitely want to try this one out soon! Only one more guest post, I hope you have been enjoying them! -Ciera
Pin
Share
Previous Story
next Story
Get the free guide to learn the top mistakes when it comes to DIY branding.
6 Ways Your DIY Branding May Be Hurting Your Business
Free Guide
© 2023 Ciera Holzenthal LLC, DBA Ciera Design Studio.
Get the free guide download by over 2,000 people!
Discover Your Brand Personality
Join Me on Insta
So pretty! I just moved into a new place, so this comes in handy. Need to try it out soon.
I’m not sure what freezer paper is, but this is a cool trick! Thanks for the tutorial! 🙂